Formatting, adding links and pictures on the Neigbrs portal
This article helps you understand how to add rich text, links and images on Neigbrs, making sure all information is displayed as you planned it.

Caue Emilio
Last Update hace 3 años
Before you start writing your text and formatting it, keep in mind that if you wish to add any images on your text box, you should first upload these images to Neigbrs as explained on this article and have the image links ready.
When creating a communication for the community residents, be it a Notice, a social media post, an Amenity Terms of service or a section from your website, Neigbrs allows you to do a few tweaks on your text to make it more personalized and better to read.
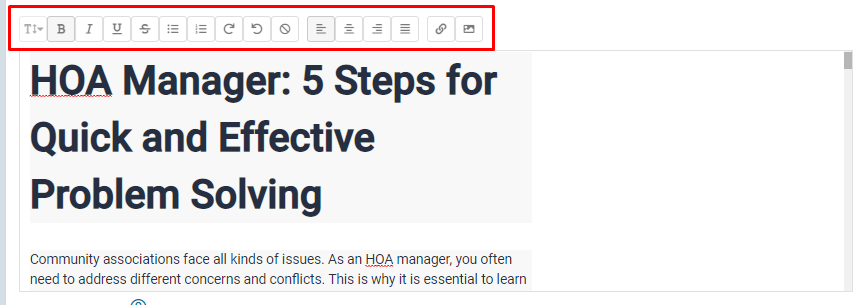
All editing tools are displayed right above all text boxes that allow for this finer editing
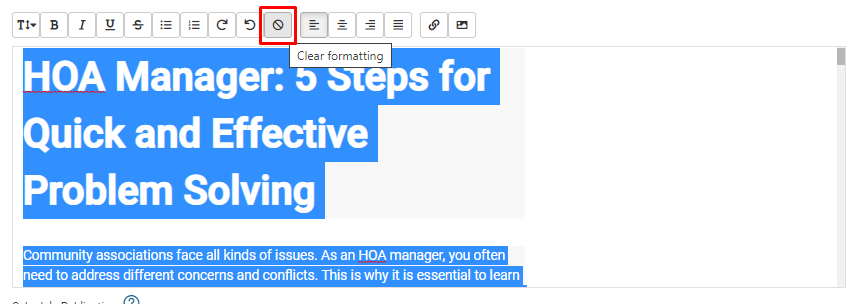
If you wish to copy and paste a text from somewhere else, like a newsletter or a board meeting minute, make sure to select all text and clear the formatting from it by clicking on the Clear Formatting button. This will make sure that all font sizes and styles can be properly shown in the portal.
To format the text, always highlight everything you wish to edit first and then click on the option.
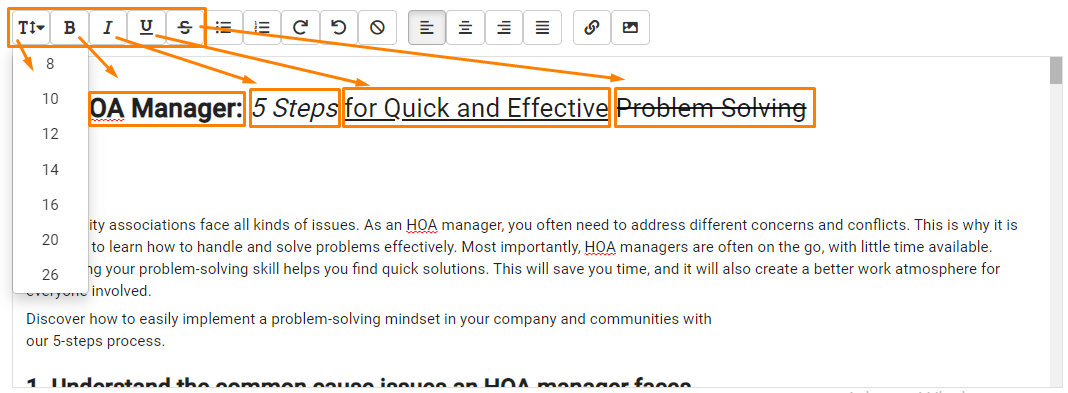
There are five font formatting options, one for font size and 4 different styles (Bold, Italic, Underline and Strikethrough
To format the text, always highlight everything you wish to edit first and then click on the option.
There are five font formatting options, one for font size and 4 different styles (Bold, Italic, Underline and Strike-through)
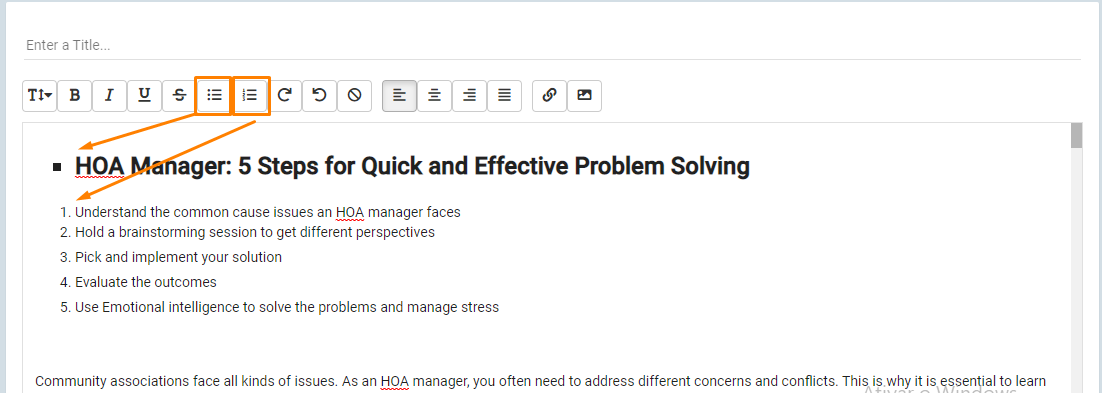
Beyond that, you can also set an
- Unordered list and
- An Ordered list
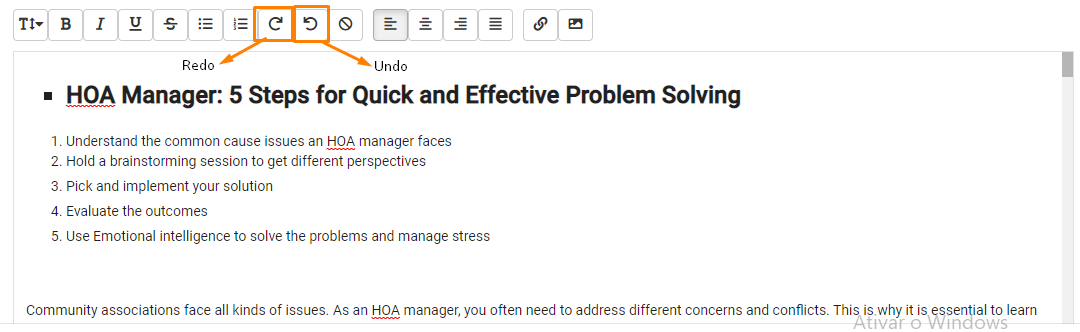
If you made a mistake or deleted something you shouldn't, you can undo the action and if you clicked the undo button one time too many, you can redo what you just undid.
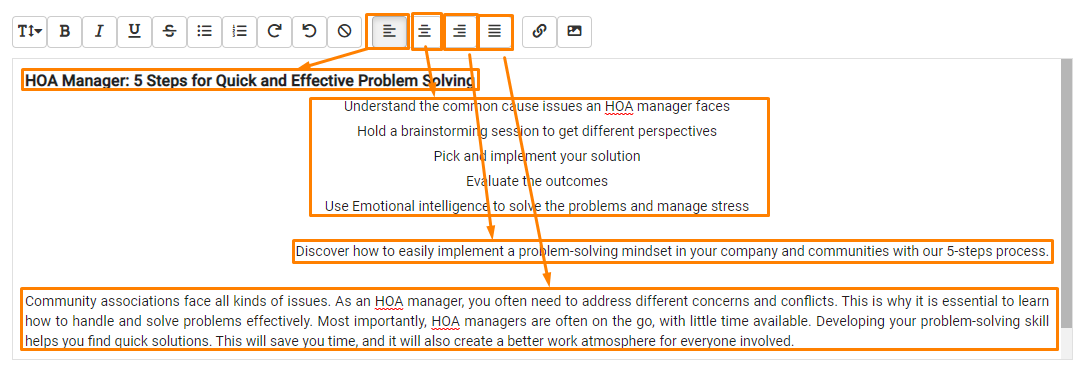
You may also align your text in four different ways:
- Left align
- Center align
- Right align
- Justify
Lastly, you can add links and pictures on your messages, but both have finer details that must be discussed.
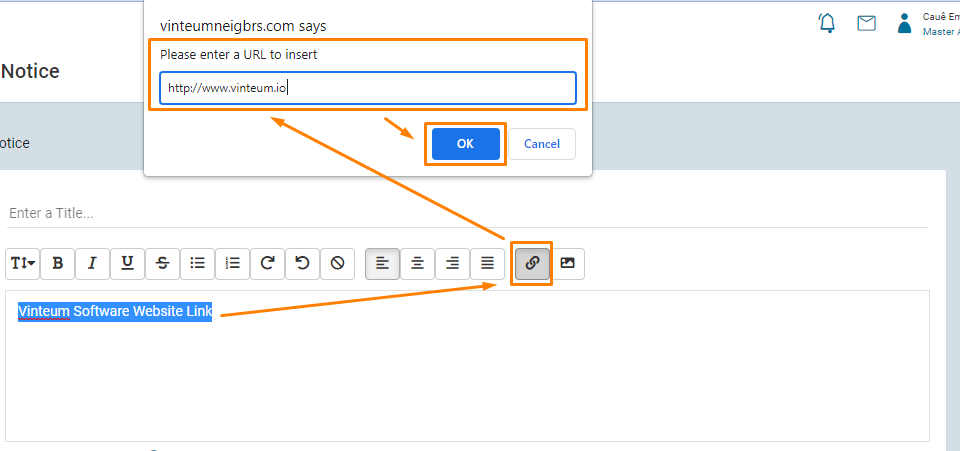
By highlighting a phrase or word, you can click on the Link button to embed a link on it.
After clicking on the Link button, a pop-up to add your link will appear at the top of the screen. Add your link and press 'OK' to confirm.
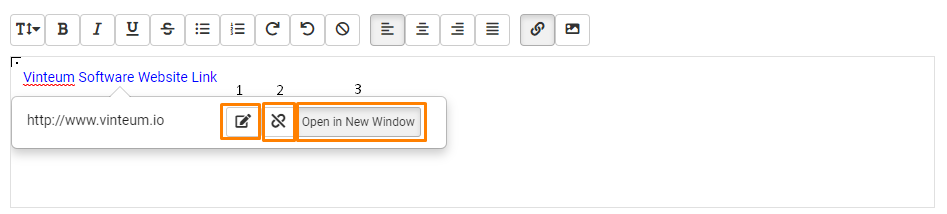
- Edit your link
- Remove the link
- Open the link on a new tab
The last button is toggled on by default and toggling it off will redirect the users that click on the link to a new page, leaving the email, website, portal or any other place where the link is embedded. For example, if you embedded the link on a Notice and the Open in New Window option is toggled off the user that clicks the link will leave the page they are reading and be redirected to the embedded link.
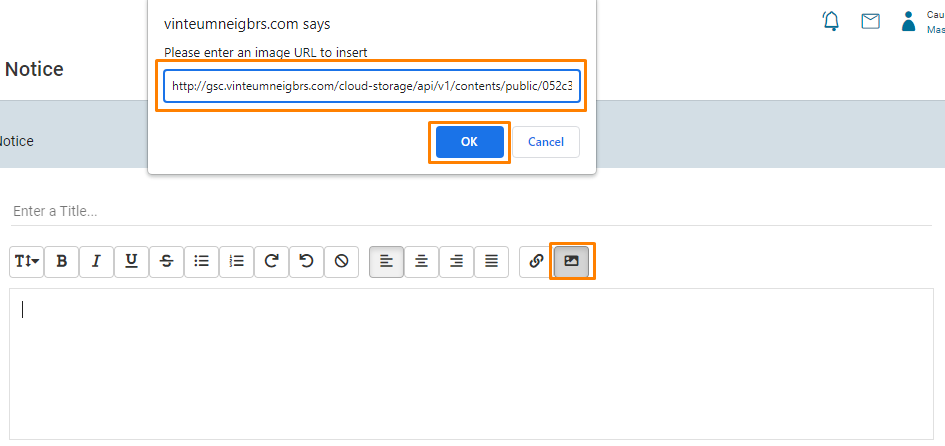
As mentioned earlier, to add an image you will need an image link and you can achieve that by following this article's steps. We recommend to store all images on our portal to make sure the links are not changed and that the links are stored in a safe database.
To add the image, click on the Picture button, paste or type the image link on the pop-up that will appear on the top of the page and click on OK.
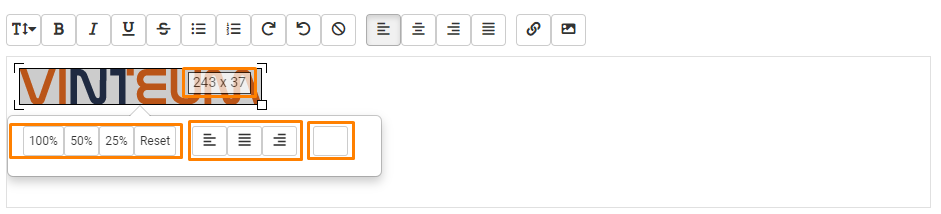
When clicking on the image added, there are a few settings that can be changed.
The image size cam be adjusted by clicking on the bottom-right corner and dragging it to the desired size or by using the 100%, 50% and 25% buttons to set the image size relative to the text box size. The reset button reverts all changes made on the image size and the current image size in pixels can be seen on a grey rectangle above the image (243 x 37 on the example below).
Images can be aligned the same way as texts and clicking on the Blank button the image is removed from the text box.
That's it, now you know everything that will help you when formatting texts on Neigbrs